Project Presentations With PowerPoint: Using Dimming Text & Other Effects to Engage Your Audience

Getting Project Buy-In From Your Team
Microsoft’s PowerPoint serves as an extremely powerful organization tool for team leaders, project leaders, and their teams. A carefully designed presentation can give the entire team focus and an excellent overview of the project, or their section of the project, as a whole.
When creating business presentations, selling your project with PowerPoint can be an extremely effective method for organizing teams. For most technical and engineering projects, being on the same page and having a visual representation of a project can be the difference between a team being on schedule and on budget and having a disorganized team with no clear goals.
Team leaders and project managers should remember, however, that PowerPoint is a visual tool, and used incorrectly, a presentation can quickly distract and the audience will lose focus, especially when text is incorporated. Once text is present on a page, people tend to read ahead instead of focusing on the vocal presentation. Keep text light on graphically heavy pages, and team leaders can use animation techniques to control the rate at which their audience reads. These techniques can also be stacked or layered in order to create advanced animations.
Simple Dimming
One very simple technique allows the presenter to control the rate at which the audience reads any text by flashing one point at a time. In order to do this, first create a text box or use a pre-made template, and make sure to list each point using bullet points.
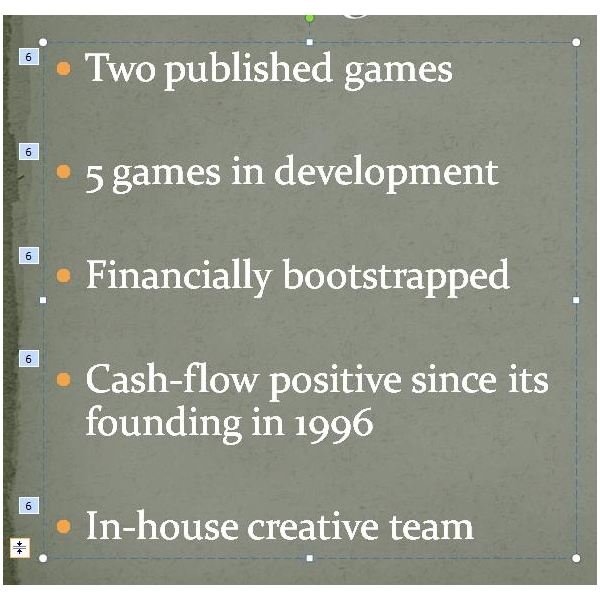
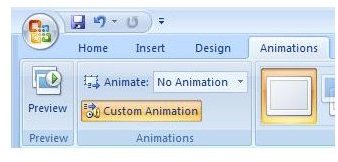
Next, assign an entry animation to the text block and pick By 1st Level Paragraphs. (I usually use Fade simply to control the speed at which the audience views each point.) Then press the Custom Animation button under the Animations tab. This should open a new working window on the far right of the current presentation screen. For now, pick On Click as the Start option for the animation. This will allow you to control how quickly you go through each point.
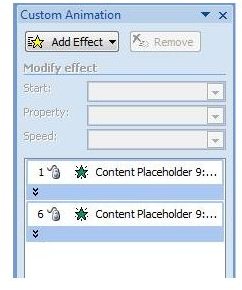
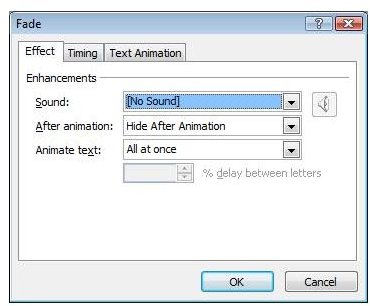
A list of each bullet point should be listed in the Custom Animation window. Highlight all the points and right click. Click on Effect Options in the drop down menu. Another window should pop up labelled Fade (or whatever entry option you choose for the animation). Under the Effect tab, find the drop down menu next to After animation. Choose the Hide After Animation option.
As a result of this animation, each bullet point will come up individually and disappear after viewing. This forces the audience to look at one point at a time.
Dimming and Reappearing
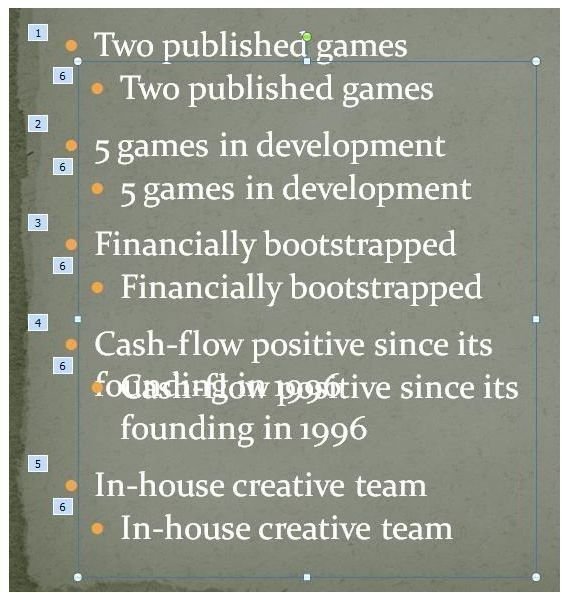
Only one animation can be placed on each block of text, so once the bullet points from the above animation are hidden, they cannot be assigned to reappear. After going through each point, however, you may wish for your team to be able to take notes, and you will want all the points to reappear. In order to do that, copy the entire text block again. The second text block will be slightly staggered so that you can see which block of identical text you are trying to manipulate. Then paste it right onto the same slide. Select the next text block and pick another entry animation. Make sure to choose All At Once in the drop box under the correct entry animation header.
A second element should now appear in the Custom Animation window. Right click on the new element and confirm that Start After Previous is the chosen. Then right click on the second element once again and pick Effect Options. In the Effect tab, make sure that you pick Don’t Dim in the After animation option.
Last, click and drag the second text box precisely over the first one and run a test animation.
Muted List, Dimming, and Reappearing
In some cases, allowing a team to glimpse all the points right from the beginning can also be very effective. You, however, want to keep their focus on the point that you are currently emphasizing.
In order to do this, make another copy of the text box and paste it. Again, the new text box will be staggered so that it can easily be identified. Highlight all the text in the box and change the text color to something that blends well with the background of your presentation. Next, place your newest text box precisely on top of your previous two boxes, and make sure that they are neatly stacked.
Last, select the latest text box again. Right click and select Send to Back from the drop-down menu. This text box will become the bottom one in the layer, and all the animations you have already done will occur on top of the fainter, blended text.
One Final Tip…
Again, remember that selling your project with PowerPoint depends on keeping your audience engaged and interested. Do not let them wander off on their own by reading ahead. Control their reading speed by using animations but give them a chance to take notes and ask questions by allowing them to briefly look over all your points. A well-organized team with excellent communication is a team that will produce results more quickly and more effectively.
References and Additional Resources
Microsoft PowerPoint Official Site, https://office.microsoft.com/en-us/powerpoint/
Screenshots taken by the author.