How to Create a Budget in Microsoft Office Project

Page content
Create Your Budget
To begin adding a budget to your project plan, you need to outline the resources used and the types of budget money they will be utilizing.
- The first thing you need to do is to add your budget categories as resources through the Resources sheet (View-> Resource Sheet).
- Once you have added your budget categories as resources, double-click on the resource name, or click on the Resource Information button (Shift+F2 - for more keyboard shortcuts, click here) and fill in the General and Costs tabs for each budget resource. After filling in all the fields you want, check the budget button on the General tab_. *note: Checking the Budget Button makes the other tabs inaccessible, so fill in any information you need before selecting it._
- Click OK, and make sure the fields in the Resource Sheet update appropriately: you should see the various rate fields in the Resource Sheet go blank.
- Return to the Gantt chart view and show the Project Summary Task by clicking the “Show Project Summary Task” box, located in Tools -> Options -> View.
- Highlight the Project Summary Task in the Gantt chart and click the “Assign Resources” button (Shift+F10).
- In the pop-up window, select your budget resources (you can select multiple resources by holding CTRL down) and hit the “Assign” button.
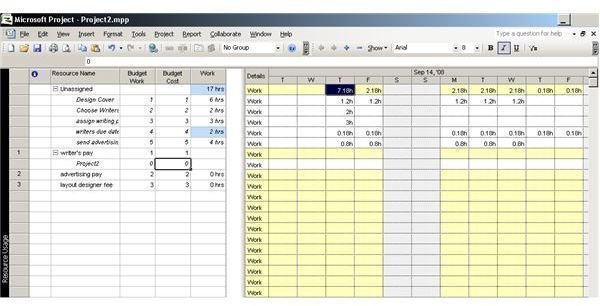
- Assign values for your budget items by going to the Resource Usage view (View -> Resource Usage) and adding in two additional columns: Budget Cost and Budget Work. You can add the columns by right-clicking over the resource name column and selecting Insert Column. Type column name into the “title” window and hit OK. After both columns have been created, enter in specific budget information into the two new columns for your budget resources and return to the resource sheet.
Defining Budget Categories, Step 1
Applying the Budget To a Project Plan
Now that you have successfully created a budget for your project plan, you’ll want to apply it to the plan to be able to view it easily.
- Switch your view to the Resource Sheet. To group all resources together that fall under the same budget item, create a text field (Tools ->Customize -> Field) with a category word or phrase that will identify the resource’s larger budget group. For example, you might want to make a category word like “Food” or “Supplies” to identify what specific budget group that resource is pulling from.
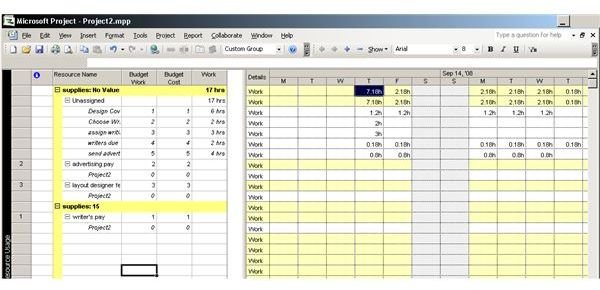
- Now, to add all these steps together and get the result desired – a budget that is applied to your project – go to the Resource Usage view and select Custom Group By (Project -> Group By -> Custom Group By) and select the custom text field that you created in the previous step.
You have now successfully applied a budget you created in Microsoft Project to a preexisting project. You can edit and update the budget fields as necessary as your project goes along, but this is a great way to get your initial budget prepared and into action.