It doesn’t matter whether you’re new to Microsoft Project 2010 or if you’ve just upgraded to the latest version of this capable project planning software. Either way, you’re bound to be surprised by the remarkable, new-and-improved Timeline view.
Are You Using the Timeline View?
When I first experienced Microsoft Project, I didn’t think the Timeline view was anything to write home about. I actually used this software for months without paying any special attention to it. After all, I didn’t hear any bells and whistles going off to announce that it had changed so drastically, so I didn’t think anything else about it.
It was when I stumbled onto a video by Heather Cull, Microsoft’s Timeline program manager, speaking from Redmond, Washington, in May 2010, that I came to understand Timeline’s potential. As Cull states, Project 2010’s Timeline updates result from the input of many Project users based on their experiences with prior versions of Project.
The Timeline provides an easy way to look at the various tasks that are a part of your project. You can easily see if you need to correct task overlap, either because of timing or staffing reasons. It’s also easy to format it and incorporate it into a project status report. You can also format the Timeline to give it some pizzazz for your stakeholders.
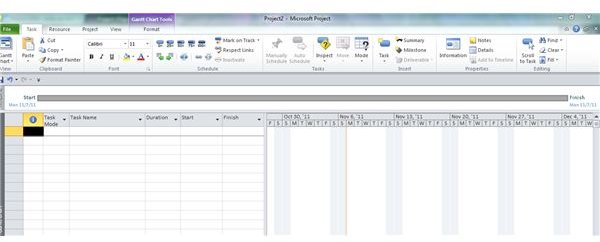
When you open or begin a new project file, the Gantt Chart view automatically shows you a drab, empty timeline running along the top of your chart. As you begin to list your tasks, you can add them individually to the timeline, and you can also access a checklist that lets you choose any or all project tasks.
Create Your Timeline
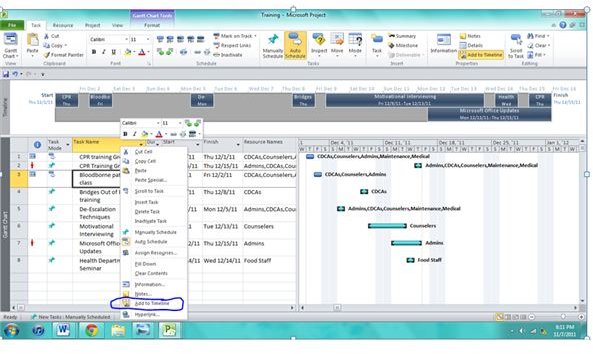
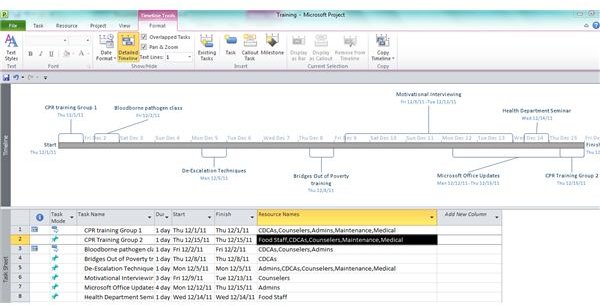
To add tasks one at a time, you can right-click on the task, and from the drop-down menu you will see Add to Timeline. Click on that, and your tasks appear on the Timeline bar. For demonstration purposes I am using a project file like one used to schedule staff training at a social service agency.
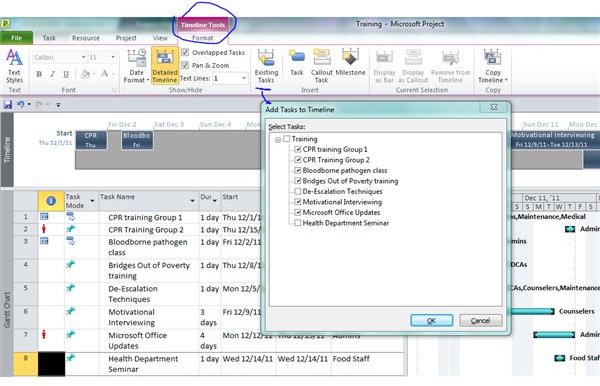
If you’ve added multiple tasks to your task list and you want to pick and choose which of them—or all of them—for inclusion on the Timeline, you need to access the conceptual Timeline tools formatting tab. (A conceptual tab is one that appears only when you’ve done something to activate it.) You can do this by clicking anywhere within the Timeline space. Once you’ve accessed it, look in the Insert group for Existing Tasks. Click on that to see a list of your tasks. Check any that you’d like to see displayed on the Timeline.
Jazzing It Up
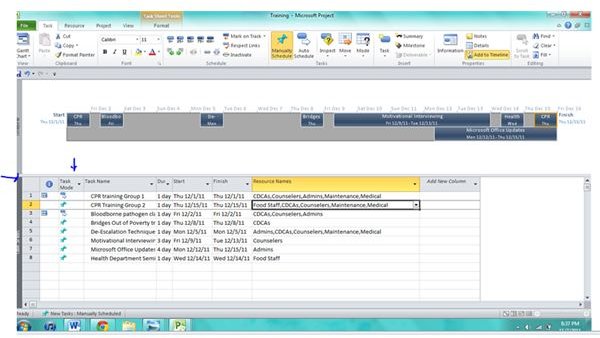
You will immediately begin to apply its usefulness. You can see that Project has alerted me that tasks 2 and 7 both have conflicting resources allocated to this. I have allotted two separate sessions for CPR training, but I initially indicated that any staff person could attend either session. Now I can see that the administrative assistants will not be able to attend CPR Training Group 2 because it conflicts with the training I have planned for them to learn the latest in updates in the Microsoft office suite. So on my resource list, I will deselect the admins from second group. If they want to become CPR certified, they must all attend the first group. Actually, you would see this information even if you were not using the Timeline, but it does prove useful for sorting out my scheduling options.
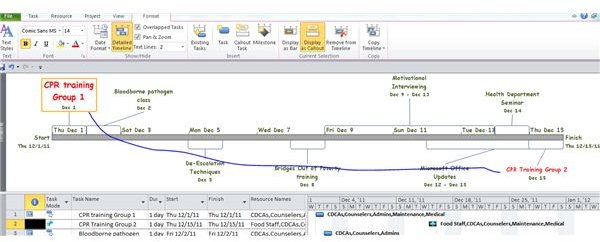
You’ll notice when you look at the bar as shown, the block on the bar is not big enough to show the name of the task. So I’m going to reformat it so that it looks vibrant and relevant to my stakeholders.
First, use your cursor to drag down the bottom border of the Timeline pane so that you have more space.
Then, drag the blocks of tasks off the bar into their own callout boxes. You can move the callouts above or below the Timeline, either to the left or right.
Another formatting option includes how you display the date. You can also change the text font and apply boldface or italics. Maybe you’d like to enlarge the font size and color-code your events. You can also apply formatting to specific areas of the Timeline by clicking in the Timeline space and then left-clicking to draw a formatting box. You can see some examples in the image below. I have color-coded the two CPR tasks. It’s easy to see how colors can differentiate between resources involved or types of tasks.
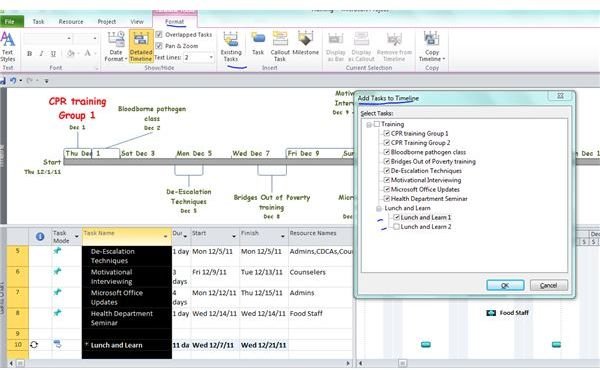
If you have recurring tasks , Project will let you select just those tasks relevant. In experimenting I discovered that when I began the projects and listed tasks all within a couple weeks of one another, and then I added a recurring task to the timeline, everything was compressed on the timeline so that all the dates of the recurring tasks could be displayed. I remedied this by adding my recurring task last. Here I’ve included a Lunch-and-Learn and designated it as recurring every second Wednesday. Within the dates of this project, it will occur twice. I cannot add this task to the Timeline by right-clicking on it. Instead, I must use the conceptual tab and click on Existing tasks. Then I can see that I have two choices to add to my Timeline. I’ll just add the first one. It shows up as a chunk on the timeline, so I just drag it out into a callout.
.
A Few Last Reminders
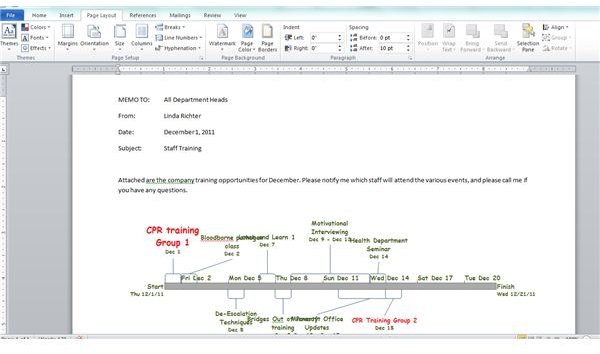
Next, you can easily copy the Timeline and paste it into a memo or report. (I find it useful to landscape my memo.) Project says you can put it into an email, but I just like to upload the memo and attach it to an email so that I don’t have to make any other adjustments.
In addition, if you want to get rid of the Timeline, you can easily turn it on and off. You just choose the Timeline box in the View tab and select it or deselect it.
A caveat for users of old Project versions: If you transfer a project file from an older version of Project to Project 2010, you might have to re-do your Timeline. Timeline formatting in Project 2010 won’t automatically apply to transferred files. At this writing the best solution I found on a users’ thread, if you’re having a problem, is to print the timeline from the old file so that you can see the order of your tasks and then re-insert them on the new file’s Timeline.
You can also print all of part of your Project timeline if you want it as an attachment to a report. Obviously most projects have a much longer duration than the one I’ve used for demonstration purposes. You can tell Project to print just specific dates, or you can tell the printer that you want only certain pages printed.

So What Do You Think?
Let me know if you’re incorporating the Timeline as one of your Project tools . What do you like best about it? What isn’t working for you? Use the comment section below, and if you’re having problems I can try to get answers for you.
Also, if you’re looking for more tips and tricks related to Project, check out Bright Hub’s Library of Microsoft Project Tutorials .
References
- Microsoft Timeline instructional video http://office.microsoft.com/en-us/project-help/video-use-the-timeline-to-view-the-big-picture-of-your-project-VA101812907.aspx
- Screenshots by the writer
- Hooked on a Feature: Timeline View Draws New Users to Microsoft Project, video, http://www.microsoft.com/presspass/features/2010/may10/05-19Timeline.mspx