Are you just making the transition from Microsoft Excel to Microsoft Project 2010 to manage your projects? Perhaps you just prefer to play around with your list of tasks before you turn it over to Project’s powerful panoply of possibilities. Here’s how you can move your Excel data into Project.
Why Are Some People Still Using Excel?
If you are new to Project, I can assure you that you’ll still be learning about everything it can do for months to come. There are so many views and charts and reports you will learn about as you use this software. Right now you’re going to learn how to import Excel files into Microsoft Project 2010.
For many, Excel offers a wide range of features that work well in managing a project. I know project managers who rarely call upon its accounting formulas; some love it just for its ability to sort data and create charts. One company vice president said to me, “I just like Excel better. Project is like a cake with too many colors used in the frosting.”
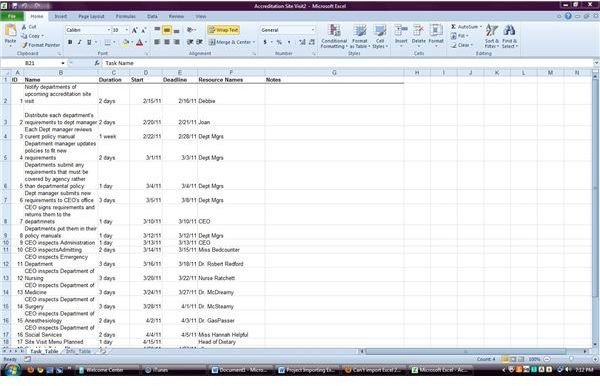
If you fall into one of those categories, you can segue your way gently into using Project . Go ahead and make your initial task lists in Excel. I knocked out the logistics for a planned accreditation site visit using Excel and then I moved it into Project. Below you’ll see my Excel worksheet as it initially appeared.
Let’s Get Started: The Official Method
Most versions of Excel come with a special template so you can move data into Project. To find it, open Excel, choose New in the Backstage area , and from your template choices choose Sample Templates. Select the one called Microsoft Project Task List Import Template.
The template will open to a worksheet with a tab that says Info_Table. Do not edit this tab, as it contains template information that Project will access. Instead, click on the Task_Table tab. You can copy and paste your data from the Excel worksheet that you want to import onto this worksheet. Be certain you have column headings on your worksheet.
For my project, I didn’t have a calendar at hand. I simply entered tasks, typed in names of staff who would need to carry them out, and estimated the dates. Save it.
Your next step is to open Project, go to its Backstage, and choose Open. When the Open dialogue box appears, look over to bottom right, beyond the File Name space; you’ll see Microsoft Project Files. Click the drop-down arrow and enter Excel Workbook. If you’re using an earlier version of Excel, choose Excel 97-2003 Workbook.
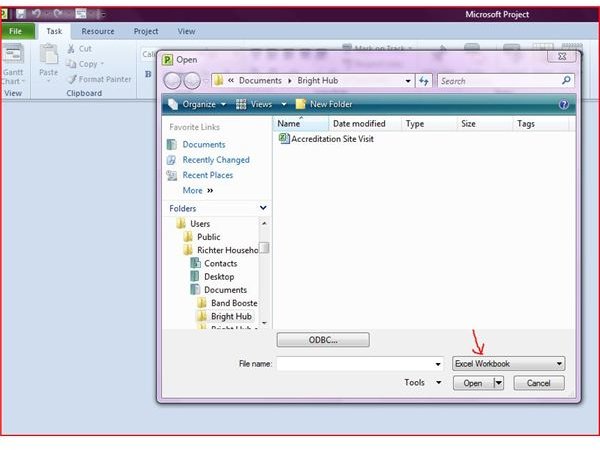
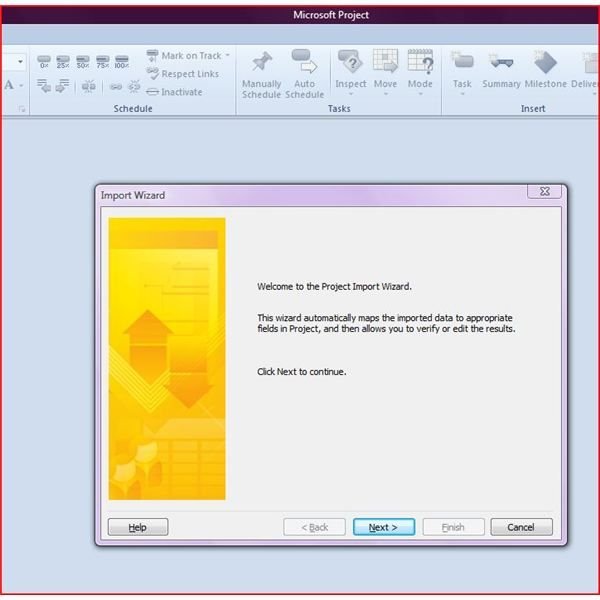
Find the Excel file you just created and named. Choose it and then click Open. The Import Wizard opens automatically. Click Next.
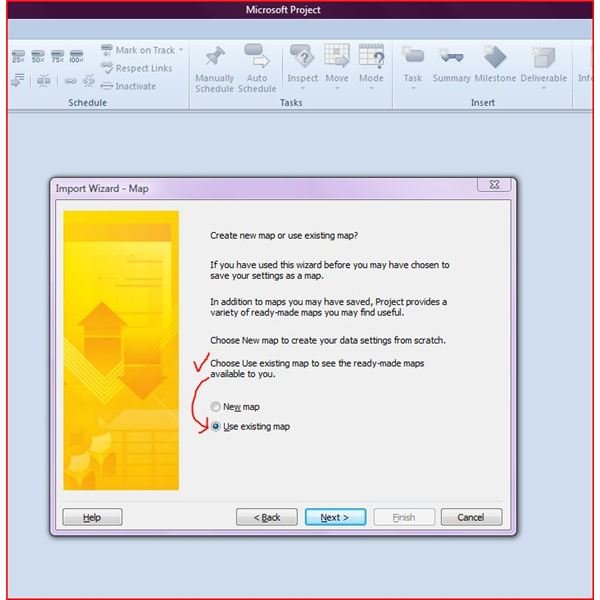
In the dialogue box, choose Use Existing Map, and then click Next.
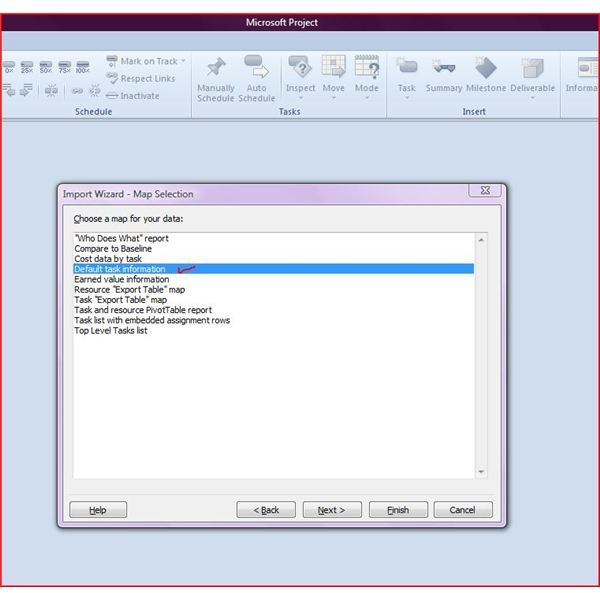
Choose Default Task Information, and then click Next.
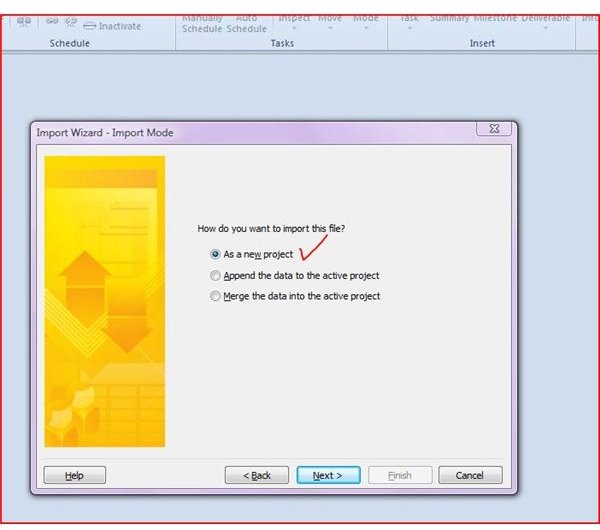
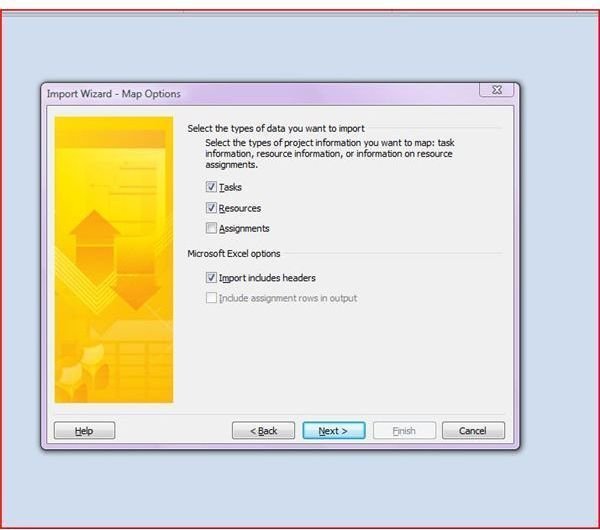
In the next Wizard screen, you will be importing your Excel file as a New Project. Later on, you can full around with the other options. Next, Wizard asks you to select what you want. I chose Tasks. Import Includes Headers is set by default, and leave it at that.
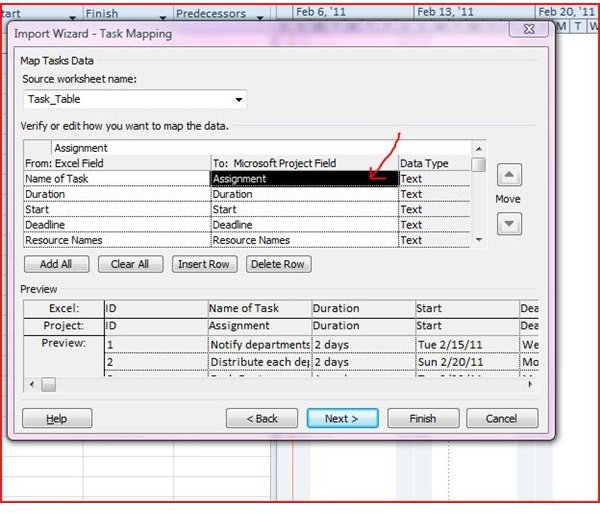
After that, you’ll see a list called Source Worksheet Name, and from this you choose Task_Table.
In the little table below, you should see on the left the headings you put into your Excel worksheet. In the column on the right, you match up the headings in your Excel file with headings for your Project file.
Important: For the names of your actual tasks, choose Name in the Project column–when your Project file is created the heading will say Task Name. I spent quite a while figuring this out.
Here’s a troubleshooting tip at this point, for those who get an error message for their column headings—especially if they are using an earlier version of Excel: Be certain your column heading titles have no spaces. For example, if the Wizard has difficult with Assigned Person, go back to Excel and rename it AssignedPerson.
Importing Without the Template: An Easier Way
If you don’t have the template, you can still import your data from Excel. In fact, as you become more comfortable with Project, you may decide why bother with the template. Once you have chosen the Excel data that you want to import, follow the steps above: Open Project, go to Open, and choose Excel Workbook in the dropdown list beside File Name. Then choose your file.
The Wizard will pop up. You click Next, then Use Existing Map, and then Next, then Default Task Information, then Next–the same steps as above. When you get to the Source Worksheet Name, your choices in the dropdown window will be Sheet1, Sheet2, Sheet3. Choose Sheet1 since this is probably the worksheet that has your data. You will then match up the headings from your Excel sheet with new headings for the Project file.
A Few Housekeeping Pointers
When you are going through the Wizard, I have recommended simply checking off Tasks. If you choose more than one–your other options are Resources and Assignments–then you will have to go through a Source Worksheet setting up column headings for each option you checked off in the Wizard. I really don’t see any point to that.
Another thing to be aware of: If you choose column headings for your Project file, and then when your Project file opens it is missing data, then click on the top of the columns in Project so that you can insert a column. From the list of columns choose those that you assigned in your Source Worksheet list. The data entered in them will then appear.
As you become more confident transferring data from Excel to Project, you might want to try your hand at mapping your own Source Worksheets. You can click on New Map and then Next, and then As A New Project, and then Next, and then Tasks, and then Next, and then match up your Excel fields with appropriate Project fields. Just be careful to choose appropriate field names in Project; if you choose % Work Complete for an End Date, for example, it is not going to correctly interpret the data it is importing.
Once You’re Done, Project Will Have Suggestions
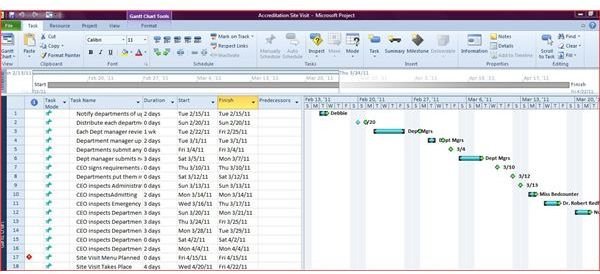
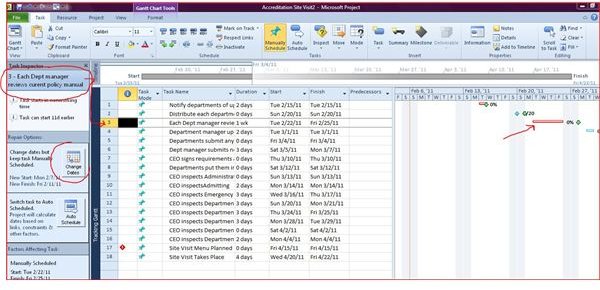
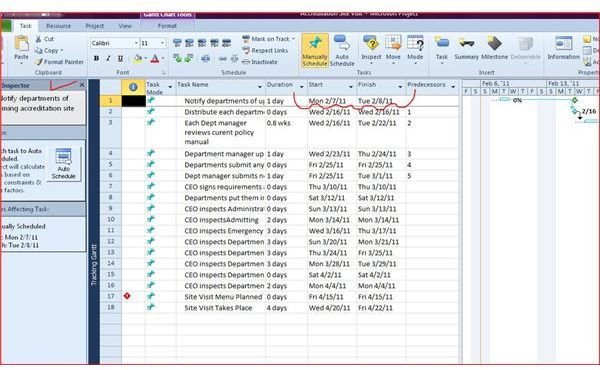
Once you’ve learned how to import Excel files into Microsft Project 2010, you will want to put some finishing touches on your new Project file. Project will have some immediate suggestions for you. For one thing, it lets you know if you’ve scheduled your tasks to occur on weekends or days when your company is not at work. You can either accept Project’s suggestions to change the dates or you can change the Calendar of work days for your project. Remember that Project is not, all evidence to the contrary, a thinking being; and so when it suggested that I move back the dates for department managers to review their policies–horrors!–I ignored that and instead moved up my date for notifying departments of the site visit.
Your resources are automatically imported from Excel into Project 2010, also.
The Finishing Touches
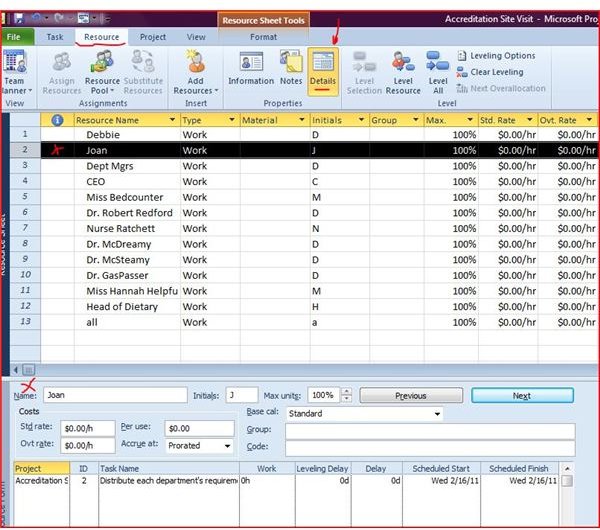
You will see, too, that your resources are nicely filled in. You can play with them so that if your Maintenance team needs to visit each department ahead of the site visit team, for example, you don’t schedule them to work in more than one department at a time. Here’s where your Resource Pool comes in handy , because if you have a separate resource pool for various types of staff, because you can check the Resource Details view to to avoid scheduling someone for multiple tasks simultaneously.
It’s also possible to insert a link in your Project 2010 file to an Excel file. You do this by right-clicking on the cell where you want the hyperlink. When you choose the Link To area, look through the list of files until you find the one you want.
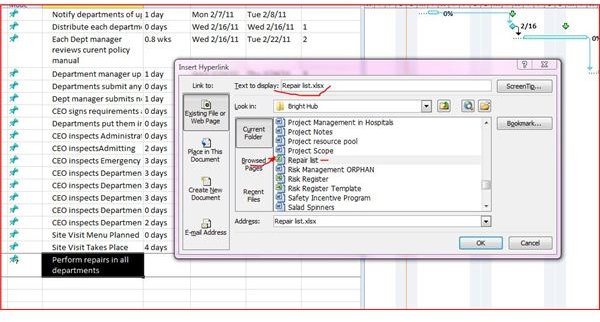
This shows my effort to link to my Excel file listing routine maintenance tasks. However, when I tried to open the link, my desktop security product stopped it from opening until I right-clicked on the list again and opened the link manually. To circumvent that inconvenience, I instead created a Note with the selected tasks inserted from Excel.
As you become more comfortable with the interplay possible between Project and Excel plus other functions, you will increase your ease with the this great project management product. I invite your comments below about problems you might have as you become accustomed to Project, including other questions about Project that you’d like to have answered.
Screenshots created by the writer.