In the continuation of this series, we’ll describe how to add new project items to a task list in Microsoft Outlook 2007.
Using Outlook to Manage Tasks
In Parts 2 and 3 of this series , we described how to create a special task list folder for project management items and how to customize what fields can be edited for those items. As we continue in this series on using Outlook 2007 to manage project schedules, we’ll describe how to add new tasks to this list.
Adding a Project Task
Step 1:
Open the Project Management folder created in Part 2 of this series. Alternatively, if you decided to use the default Tasks folder to manage your project task list, open that instead.
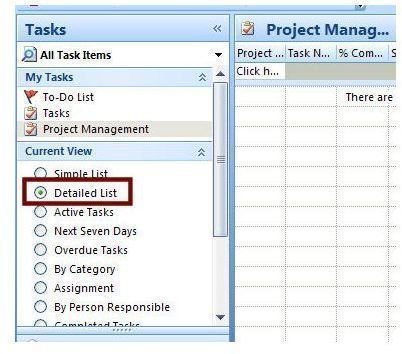
Step 2: Check to make sure that the Current View for the folder is set to Detailed List. (Click the image on the right for a larger view.)
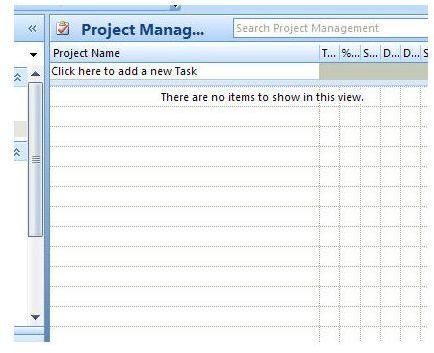
Step 3: Position your cursor on the first field of the area where the words Click here to add a new Task are shown.
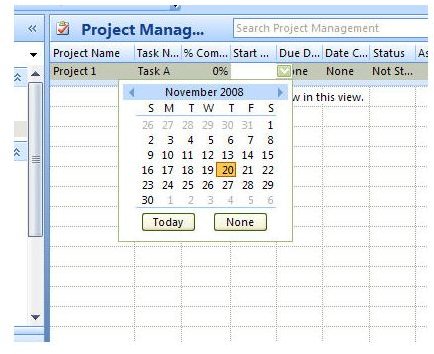
Step 4: Begin typing in the information for the task. After entering the information for one field, use the TAB key to navigate to the next field in the entry. You can also navigate to a different field by clicking on it. This latter method is particularly useful if you’re entering information into a field that contains data on dates. After selecting a “date” field, click on the down arrow present at the end of the field. This will bring up a calendar from which you can select a specific date.
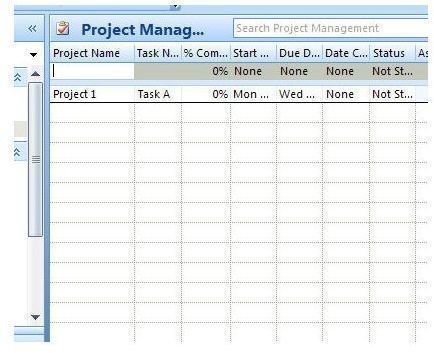
Step 5: After entering all available information, click again or use the Enter key to signal that you are done. The new task will appear on the list as shown in the screenshot below.
Step 6: Double-click on the entry to open it in a new window. You can use this window to add more details about the task.
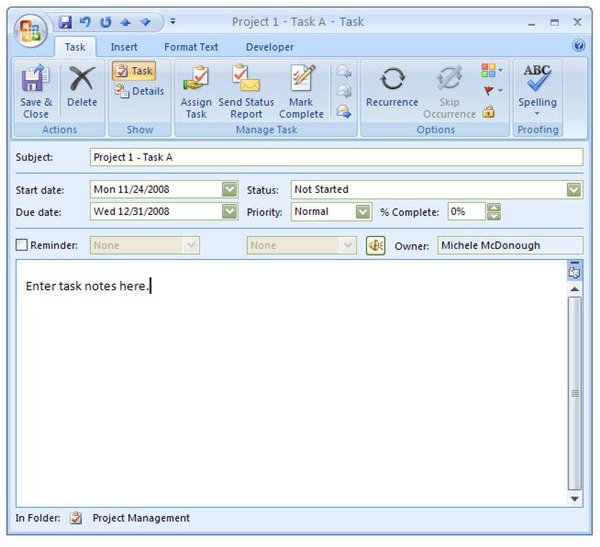
One important thing you should be sure to add is a Subject if that was not already part of your original list of field categories. This will be important when we get to the subject of status reports in Part 6 of this series.
Step 7: Click the Save & Close button when done, and you’ll be returned to the full list of tasks.
Anytime that you want to update the item with additional information, including progress made on task, you can do so using Steps 6 and 7 described above. Keeping good notes on the task will make it much easier to create status reports later on in the project.
In the next part of this series , we’ll discuss how items in the task list can be assigned to other project team members.
This post is part of the series: Project Management with Microsoft Outlook 2007
The task scheduling abilities of Microsoft Outlook 2007 can be used to either build a full project management system or to complement existing software. In this series, we’ll discuss how the Outlook task management system can be more fully utilized.
- Using Outlook 2007 Part 1: Task Management Features for Project Schedules
- Using Outlook 2007 Part 2: Manage Projects in a New Task Folder
- Using Outlook 2007 Part 3: Defining Project Task Fields
- Using Outlook 2007 Part 4: Adding Project Tasks
- Using Outlook 2007 Part 5: Assigning Project Tasks
- Using Outlook 2007 Part 6: Creating Status Reports